Imagine this scenario: You have just spent three hours recording a complex software tutorial. You nailed the voiceover, the mouse movements were smooth, and the technical explanation was perfect. You hit “Export,” and there it is—a giant, semi-transparent brand logo stamped right across the center of your video.
Nothing screams “amateur” quite like a forced watermark on a professional presentation.
For instructional designers, software trainers, and content creators, software simulations are vital tools. They bridge the gap between theory and practice. However, producing high-quality tutorials requires more than just hitting the “Record” button; it requires a blend of preparation, technique, and the right tools. Specifically, you need a reliable Free Screen Recorder No Watermark that allows your content to shine without distraction.
In this guide, we will walk you through the essential best practices for creating professional software simulations and introduce you to a tool that not only records your screen for free but also empowers you to edit like a pro.
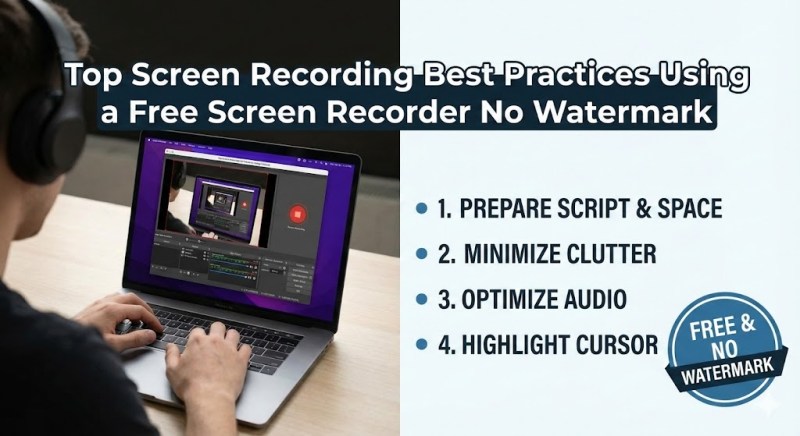
Phase 1: Preparation – The Foundation of a Great Simulation
Before you even open your recording software, the work begins on your desktop. A cluttered environment creates “visual noise” that distracts learners from the specific steps you are trying to teach.

Clean Up Your Digital Environment
Your screen is your stage. You wouldn’t film a movie on a messy set, so don’t record a tutorial on a messy desktop.
- Hide Desktop Icons: Right-click on your desktop, select View, and uncheck Show desktop icons. This instantly creates a clean slate.
- Neutral Wallpaper: Replace personal photos or busy patterns with a solid color (usually a soothing blue or grey) or a standard brand background. This ensures text and icons pop.
- Disable Notifications: Turn off “Do Not Disturb” modes on Windows or macOS. A pop-up email from a colleague in the middle of a recording is a surefire way to ruin a take.
Scripting and Storyboarding
Never try to “wing it.” Even if you know the software inside out, pausing to think about where to click next makes the video feel sluggish.
- The Storyboard: Map out the exact path you will take through the software. What is the starting point? What is the final outcome?
- The Script: If you are recording audio live, write a script. If you are recording voiceover later (which we recommend), write a detailed outline of actions to ensure your timing matches the intended narration later.
Resolution and Aspect Ratio
Consistency is key. Most users today consume content in 1080p (1920×1080).
- Ensure your monitor resolution matches your recording output. If you record on a 4K monitor but export to 1080p, the text in your software interface may look tiny and unreadable.
- Tip: If possible, lower your screen resolution to 1920×1080 before recording to ensure what you see is exactly what the viewer gets.
Phase 2: Choosing the Right Tool
This is where many creators get stuck. The internet is flooded with “free” tools, but most come with a catch: time limits, restricted features, or the dreaded watermark.
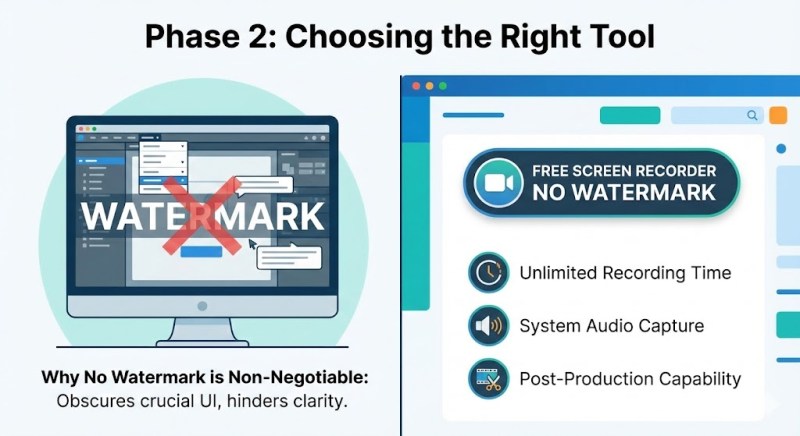
Why “No Watermark” is Non-Negotiable
In software simulations, you are often teaching users how to navigate complex interfaces. You need to show dropdown menus, tooltips, and status bars. A watermark often sits in the corners or center of the video, literally obscuring the buttons you are trying to show. A Free Screen Recorder No Watermark is not just a vanity choice; it is a functional necessity for clarity.
Criteria for the Best Free Screen Recording Software No Watermark
When hunting for the right software, ensure it checks these boxes:
- Unlimited Recording Time: Some free tools cut you off after 5 minutes. Real tutorials often take longer.
- System Audio Capture: It must be able to record the sounds the computer makes (like error beeps or notification chimes), not just your microphone.
- Post-Production Capability: Recording is only half the battle. You need to be able to cut out mistakes without needing a second, expensive video editor.
Phase 3: Recording Techniques for Clarity
Once your environment is prepped and your tool is selected, it’s time to record.
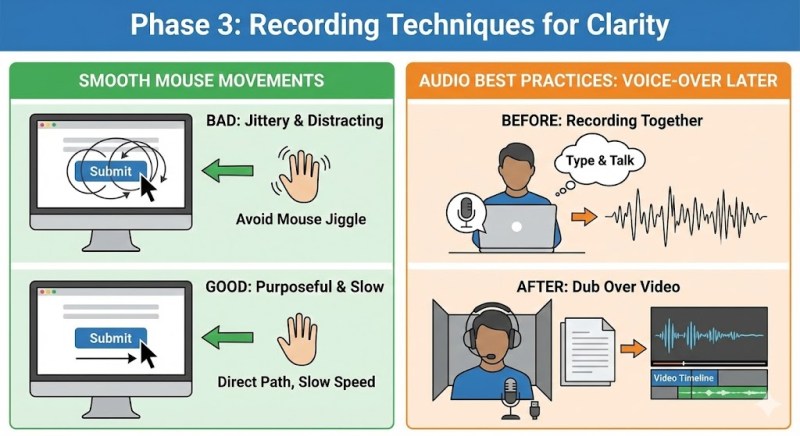
Smooth Mouse Movements
In a software simulation, the mouse cursor is the protagonist. The viewer’s eye follows it everywhere.
- Move with Purpose: Move the mouse in straight, direct lines to the button you want to click.
- Avoid “Mouse Jiggle”: We often unconsciously circle the mouse while talking or thinking. In a video, this is dizzying. Keep your hand off the mouse when you aren’t actively clicking.
- Slow Down: Perform actions slightly slower than you would naturally. Give the viewer time to process where you are clicking.
Audio Best Practices: The “Voice-Over Later” Technique
For the cleanest result, consider recording the video first without speaking, and then dubbing the audio over it.
- Why? It is very difficult to type, click, and speak perfectly at the same time. Doing them separately allows you to focus on getting the visual flow perfect.
- Microphone Quality: Use a USB headset or a dedicated microphone. Laptop built-in mics pick up keyboard typing sounds and fan noise, which lowers the perceived quality of your simulation.
Phase 4: Post-Production Magic
Raw footage is rarely perfect. Post-production is where you polish your simulation into a professional learning asset.
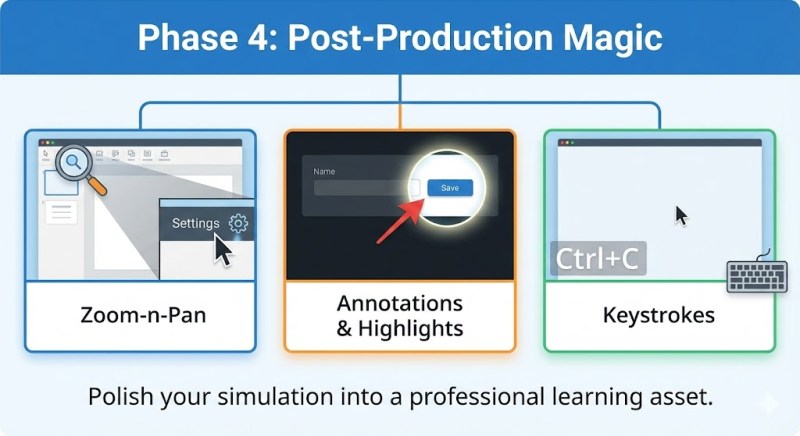
The Art of Zoom-n-Pan
Software interfaces are dense. If you are showing a specific setting in a toolbar, the viewer might miss it on a small screen (like a mobile device).
- Zoom In: Use your editor to zoom in on the specific menu you are interacting with.
- Pan: Smoothly follow the mouse if it moves to a different section.
Adding Annotations and Highlights
Sometimes, the mouse cursor isn’t enough.
- Spotlights: Darken the rest of the screen and keep only the active button bright.
- Shapes: Use red boxes or arrows to point out critical fields.
- Keystrokes: If you use a shortcut (like Ctrl+C), make sure to add a text overlay on the screen so the viewer knows what you pressed.
Phase 5: The Ultimate Solution – Why We Recommend ActivePresenter
Finding a tool that handles all the above—recording, editing, zooming, and annotating—usually requires buying expensive software suites. However, there is a powerful exception that is widely recognized in the eLearning community.
We strongly recommend Atomi ActivePresenter.
While many know it as a high-end eLearning authoring tool, its Free Edition is arguably the best free screen recording software no watermark available for Windows and macOS today.
Here is why ActivePresenter stands out from the crowd:
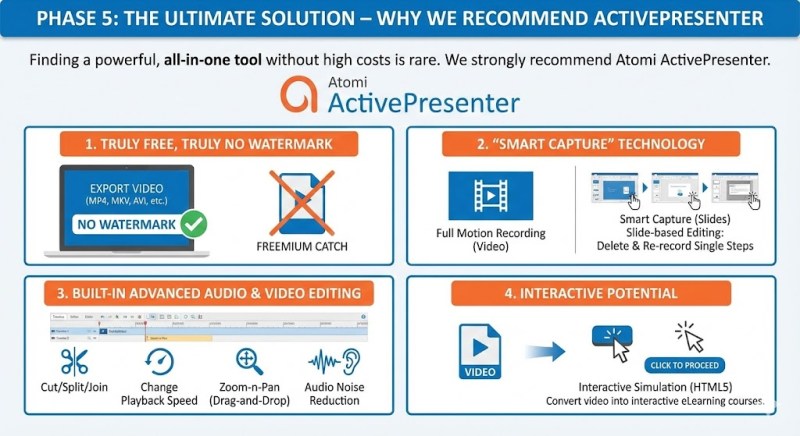
1. Truly Free, Truly No Watermark
Unlike “freemium” tools that trick you, ActivePresenter allows you to use all its recording features and export your video (MP4, MKV, AVI, etc.) without any watermark. It is free for personal and non-commercial use, and the quality is identical to the paid version.
2. “Smart Capture” Technology
This is a game-changer for software simulations. ActivePresenter offers two recording modes:
- Full Motion Recording: Records like a standard video (great for YouTube).
- Smart Capture: This mode automatically captures a screenshot every time you click a mouse or press a key. It effectively turns your process into a series of slides. This makes editing incredibly easy—if you made a mistake on step 5, you can just delete that “slide” and re-record that one step, rather than re-doing the whole video.
3. Built-in Advanced Audio & Video Editing
You don’t need to export your footage to Adobe Premiere or Camtasia. ActivePresenter includes a full timeline editor. You can:
- Cut/Split/Join ranges of video.
- Change playback speed (speed up boring loading screens).
- Add “Zoom-n-Pan” effects with a simple drag-and-drop interface.
- Audio Noise Reduction: It even has a built-in feature to remove background hiss from your microphone audio.
4. Interactive Potential
If you ever decide to move beyond video and create actual eLearning courses (HTML5), ActivePresenter allows you to convert your recording into an interactive simulation where the user must click the right button to proceed.
Conclusion
Creating high-quality software simulations doesn’t require a Hollywood budget. It requires discipline in preparation, deliberate movement during recording, and the right software to bring it all together.
Don’t let watermarks devalue your hard work. By choosing a robust tool like ActivePresenter, you gain access to a professional suite of recording and editing features that are usually reserved for paid software.
Ready to upgrade your tutorials? Stop struggling with limited tools. Download Atomi ActivePresenter today and experience the freedom of a powerful, watermark-free screen recorder for your next project.

Leave a comment