Let’s be honest: clicking through a standard PowerPoint file isn’t “learning”—it’s just reading. If you want your audience to truly engage with your content and your LMS to actually track their progress, it’s time to move beyond the .pptx format. By utilizing modern eLearning authoring tools, you can transform your existing slides into an interactive SCORM package that records scores, completion rates, and learner behavior. Stop settling for “invisible” learners. Whether you are a first-time creator or a seasoned instructional designer, this 5-step roadmap will walk you through the seamless transition from passive slides to a high-performance SCORM module.

Why Should You Convert PowerPoint to SCORM?
Before we dive into the “how,” let’s look at the “why.” PowerPoint is a presentation tool, not a tracking tool. By converting your slides to SCORM using eLearning authoring tools, you gain several key advantages:
- Learner Tracking: You can see exactly which learners completed the course.
- Assessment and Scoring: You can embed quizzes and report the scores directly to your LMS gradebook.
- Interactivity: SCORM allows for “branching” (where a learner’s choice determines what slide they see next) and interactive buttons.
- Universal Compatibility: SCORM is the industry standard. A SCORM-compliant file will work on almost any LMS, such as Moodle, Canvas, or TalentLMS.
5 Simple Steps to Convert PowerPoint File into SCORM
So you know the benefits of SCORM, here are 5 simple steps to help you convert a PowerPoint file into a Scorm package successfully:
Step 1: Prepare Your PowerPoint Content
The first step doesn’t happen in a converter; it happens in PowerPoint itself. To ensure a smooth transition, you should “clean up” your slides.
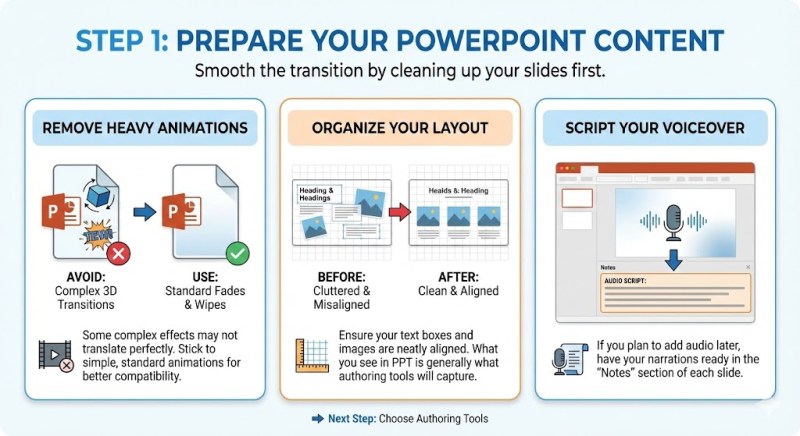
- Remove Heavy Animations: Some complex 3D transitions in newer versions of PowerPoint may not translate perfectly. Stick to standard fades and wipes.
- Organize Your Layout: Ensure your text boxes and images are aligned. What you see in PPT is generally what the eLearning authoring tools will capture.
- Script Your Voiceover: If you plan to add audio later, have your notes ready in the “Notes” section of each slide.
Step 2: Choose the Right eLearning Authoring Tools
This is the most critical step. Not all converters are created equal. Some only turn slides into a video, while others create a fully interactive experience. When searching for the best free eLearning authoring tools, you want a balance between ease of use and powerful features.
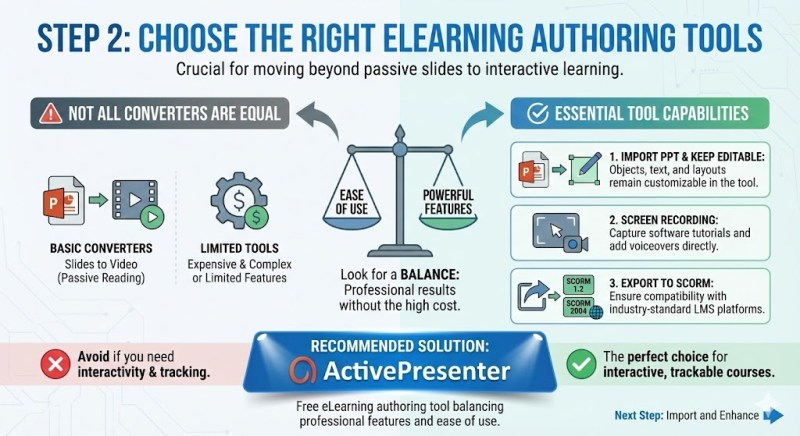
While there are many expensive options on the market, you don’t need to spend thousands of dollars to get professional results. You need a tool that can:
- Import PPT files while keeping objects editable.
- Record your screen for software tutorials.
- Export to SCORM 1.2 or SCORM 2004.
Step 3: Import and Enhance with Interactivity
Once you have selected your software—such as ActivePresenter—the next step is to import your PowerPoint file.
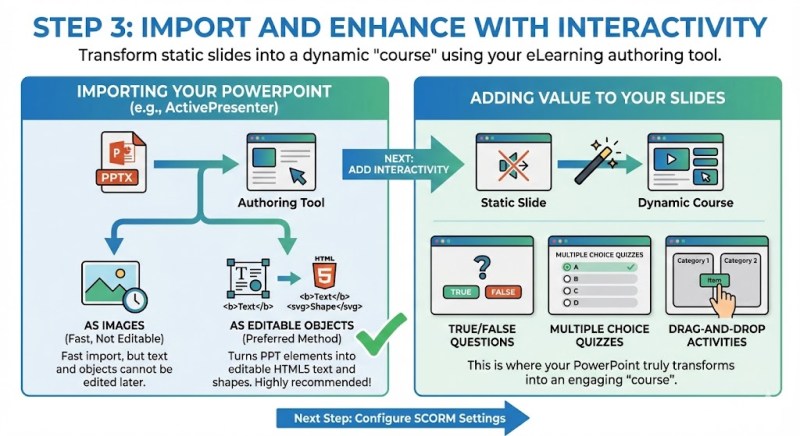
Most high-quality eLearning authoring tools allow you to import slides in two ways:
- As Images: Fast, but you cannot edit the text later.
- As Editable Objects: This is the preferred method. It turns your PPT text boxes into HTML5 text and your shapes into editable objects.
Adding Value to Your Slides: Static slides are boring. Use this step to add interactivity. Add “True/False” questions, “Multiple Choice” quizzes, or “Drag-and-Drop” activities. This is where your PowerPoint truly transforms into a “course.”
Step 4: Configure Your SCORM Settings
Before hitting the export button, you must tell the software how to report data to your LMS. In your authoring tool’s “Export” or “Project” settings, look for the LMS Reporting section.
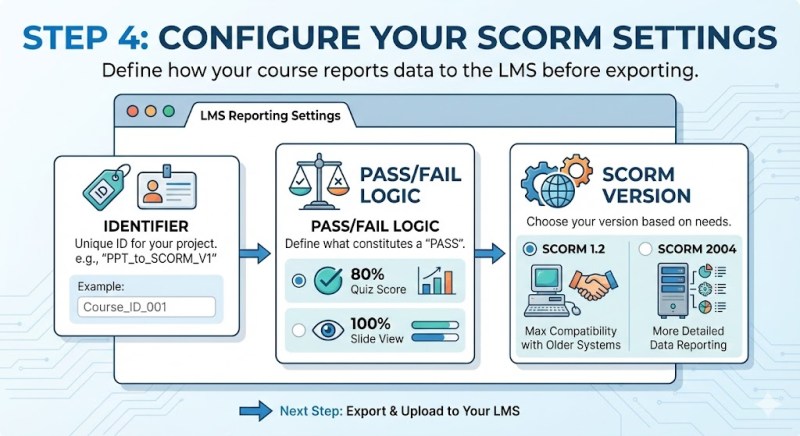
- Identifier: Give your project a unique ID.
- Pass/Fail Logic: Define what constitutes a “pass.” Is it 80% on a quiz? Or just viewing 100% of the slides?
- SCORM Version: Choose SCORM 1.2 for maximum compatibility with older systems, or SCORM 2004 if you need more detailed data reporting.
Step 5: Export and Upload to Your LMS
The final step is the easiest. Click Export to SCORM. The software will generate a .zip file.
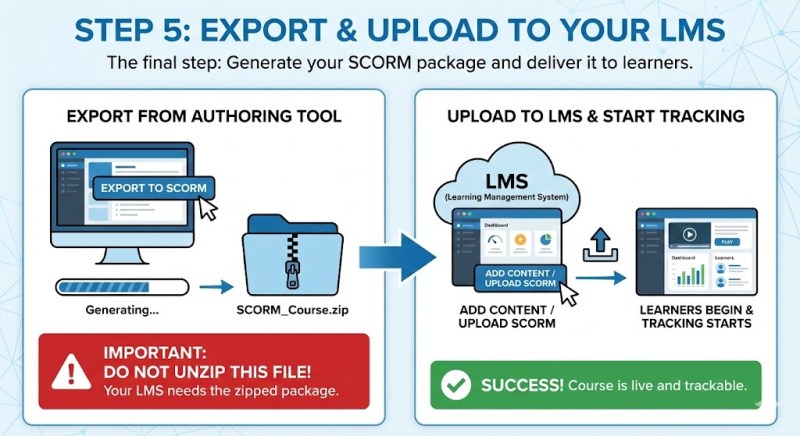
Important: Do not unzip this file! Your LMS is designed to read the contents of the zipped package. Simply log into your LMS, click “Add Content” or “Upload SCORM,” and select your file. Once uploaded, your learners can begin the course, and you can begin tracking their progress.
Why ActivePresenter is the Best Solution for Your Project
If you are looking for a tool that makes these five steps effortless, we highly recommend Atomi ActivePresenter. It is widely considered one of the best free eLearning authoring tools available today, especially for those who need professional features without a steep learning curve.
The Power of ActivePresenter
ActivePresenter is not just a converter; it is an all-in-one solution for screen recording, video editing, and eLearning design. Whether you are a teacher or a corporate trainer, it provides the flexibility you need.
Key Benefits (USPs):
- Seamless PowerPoint Integration: Unlike other tools that “flatten” your slides, ActivePresenter allows you to import PowerPoint presentations as editable objects. This means you can change a typo or update an image directly within the tool without going back to PowerPoint.
- Advanced Screen Recording & Video Editing: Most eLearning authoring tools have very basic video features. ActivePresenter includes a full-featured video editor. You can record your screen, cut out mistakes, add “picture-in-picture” webcam footage, and use “Green Screen” effects to make your lessons look like high-budget productions.
- Unbeatable Value: ActivePresenter offers a very generous free version for personal and non-commercial use with no time limits. Even the paid versions are a fraction of the cost of competitors like Articulate Storyline or Adobe Captivate, making it the top choice for budget-conscious professionals.
Pro-Tips for Successful SCORM Conversion
To ensure your learners have the best experience, keep these tips in mind:
- Test on SCORM Cloud: Before sending your course to your boss or students, upload the .zip file to SCORM Cloud. It is a free industry tool that tells you if your file is working correctly.
- Keep File Sizes Small: If your PPT has high-resolution videos, use the video compression tools in ActivePresenter to ensure the course loads quickly even on slow internet connections.
- Navigation is Key: Always include a “Next” and “Back” button on every slide so learners don’t get stuck.
Conclusion
Converting PowerPoint to SCORM doesn’t have to be a technical headache. By following these five simple steps and using powerful eLearning authoring tools like ActivePresenter, you can turn a simple slideshow into a dynamic, trackable, and engaging learning experience.
Ready to take your training to the next level? [Download ActivePresenter today] and see how easy it is to transform your PowerPoint presentations into professional SCORM courses for free!

Leave a comment