If there is one thing I’ve learned after 10 years of creating eLearning courses and producing tech tutorials, it’s this: Your tools can either be your best friend or your worst nightmare.
We are in 2026, and the standard for video content is higher than ever. You are likely staring at iTop Screen Recorder right now, wondering if it’s the solution you’ve been looking for. Is it truly a capable free screen recorder, or is it just another “freemium” trap that promises the world but delivers a giant watermark on your final video?

I have tested hundreds of recording tools over the last decade, from clunky legacy software to the latest AI-powered apps. I know the frustration of spending hours recording, only to find the audio out of sync or the quality degraded. In this honest review, I’m not just going to read you the spec sheet. I’m going to tell you exactly how iTop performs in the real world.
But more importantly, I’m going to share a “hidden gem” that most pros keep to themselves. It’s a tool that didn’t just replace my recorder, but also my editor, ActivePresenter, and it might just be the Best free screen recorder for PC you haven’t tried yet. Let’s get to the truth.
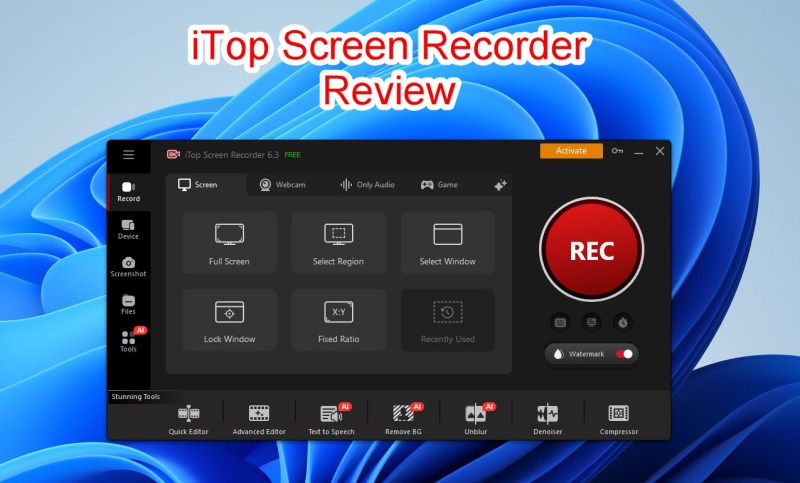
What is iTop Screen Recorder?
iTop Screen Recorder (formerly associated with IObit) is a Windows-based software designed to capture screen activity, audio, and webcam footage. It has gained popularity due to its straightforward interface and “Game Mode” features.
In 2026, iTop positions itself as a tool for everyone, from casual users who need to record a quick meeting to gamers who want to upload footage to YouTube. It promises 4K recording and low CPU usage, which sounds ideal on paper. But as we dig deeper, we need to separate marketing claims from actual user experience.
System Requirements
Before installing, you need to know if your rig can handle it. Generally, iTop is lightweight:
- OS: Windows 10/11 (64-bit recommended).
- Processor: Intel/AMD 1GHz or faster.
- RAM: 2GB (4GB recommended for HD recording).
Deep Dive: Key Features of iTop Screen Recorder
To give a fair assessment, let’s look at what iTop actually does well. If you are looking for a free screen recorder for basic tasks, here is what you get:
1. Flexible Screen Capture
iTop allows you to select specific regions of your screen. You can record the full screen, a specific window (great for locking onto a browser), or a fixed aspect ratio (like 16:9 for YouTube or 9:16 for TikTok/Shorts). This flexibility is standard in 2026, but iTop executes it with a clean UI.
2. Webcam and Audio Overlay
For reaction videos or tutorials, you can record your webcam alongside your screen. You can position the webcam overlay in any corner. Additionally, it supports recording system audio (what you hear) and microphone audio (what you say) simultaneously.
3. Game Mode (HUD)
This is iTop’s strongest selling point for the younger demographic. It utilizes hardware acceleration (NVIDIA, AMD, Intel) to record gameplay with minimal lag. It can display FPS (Frames Per Second) on the screen, allowing gamers to monitor performance while recording.
4. Basic Built-in Editor
The keyword here is “Basic.” iTop includes a lightweight editor that allows you to trim the ends of your video or add simple filters. It is useful if you just need to cut out the awkward silence at the start of a recording.

The Reality Check: Limitations of the Free Version
Here is where the “Truth” part of our title comes into play. While iTop acts as a decent free screen recorder, serious content creators often hit a wall. Here are the friction points you will likely encounter with the free version in 2026:
The Watermark Issue
This is the biggest “deal-breaker” for professionals. The free version of iTop Screen Recorder often enforces a watermark on your exported video. Nothing screams “amateur” more than a giant logo covering your presentation or gameplay. To remove it, you usually have to upgrade to the Pro (paid) version.
Limited Editing Capabilities
While iTop has an editor, it is extremely rudimentary.
- No Multi-track Editing: You cannot edit audio and video separately on different tracks.
- No Annotations: You cannot add professional shapes, highlights, or text boxes easily during post-production.
- No Interactivity: It produces a flat video file. You cannot create clickable content.
Export Restrictions
Free users are often capped at lower resolutions or specific file formats. If you are aiming for crisp 4K tutorials or 60FPS smooth motion, the free tier might restrict you, forcing a downgrade in quality.
Expert Insight: If you are recording a quick bug report for your IT team, iTop is fine. But if you are building a personal brand, teaching a course, or starting a YouTube channel, the watermark and lack of editing tools will eventually hold you back.
The Superior Alternative: Why Experts Switch to ActivePresenter
If you are looking for the Best free screen recorder for PC that offers professional power without the “freemium” traps, you need to look at ActivePresenter.
ActivePresenter, developed by Atomi Systems, is often synonymous with high-end eLearning authoring, but its screen recording core is free, powerful, and remarkably generous. It is not just a recorder; it is a full-fledged video editor and eLearning authoring tool.
Here is why ActivePresenter is the “Secret Weapon” for savvy content creators in 2026:
USP 1: No Time Limits & No Watermark (Truly Free)
Unlike iTop, the free edition of ActivePresenter is incredibly generous for personal and non-commercial use.
- No Watermark: Your videos look professional and clean.
- Unlimited Recording Time: Record a 2-hour webinar or a 10-minute tutorial—it makes no difference.
- High Quality: Export in Full HD or higher without restrictions.
USP 2: Advanced Video Editing Suite
ActivePresenter doesn’t just record; it allows you to polish. It features a timeline-based editor similar to Adobe Premiere or Camtasia, but simpler to use.
- Smart Annotation: Add shapes, arrows, spotlights, and closed captions easily.
- Audio Engineering: Use built-in tools to remove background noise (Audio Noise Reduction) and normalize volume (Audio Normalization).
- Zoom-n-Pan: vital for software tutorials where you need to guide the viewer’s eye to a specific button.
USP 3: The “Smart Capture” Technology
This is a game-changer. While standard recorders (like iTop) record a video stream, ActivePresenter’s Smart Capture mode records the screen as a series of slides based on your mouse clicks. This allows you to edit the mouse cursor path after recording, change the text you typed without re-recording, and create interactive simulations.
Head-to-Head Comparison: iTop vs. ActivePresenter
To help you visualize the difference, let’s compare these two contenders side-by-side.
| Feature | iTop Screen Recorder (Free) | ActivePresenter (Free Edition) |
| Watermark | Yes (Usually present) | NO (Clean output) |
| Recording Limit | Often restricted | Unlimited |
| Editing Interface | Basic Trimming | Multi-track Timeline (Pro level) |
| Audio Editing | None | Noise Reduction, Fade In/Out |
| Webcam Recording | Yes | Yes (Green Screen/Chroma Key supported) |
| Export Formats | MP4, AVI, etc. | MP4, AVI, MKV, WebM, HTML5 |
| Use Case | Quick, casual clips | Professional Tutorials, eLearning, YouTube |
Step-by-Step Guide: Creating Professional Videos with ActivePresenter
Since we have identified that ActivePresenter is the superior choice for serious users, let’s walk through how to use it. This section will demonstrate how easy it is to produce high-quality content.
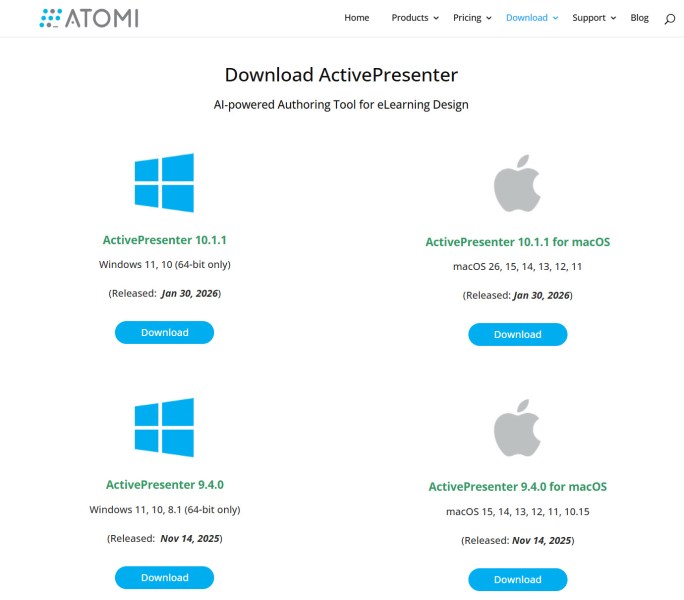
Step 1: Download and Installation
Visit the official ActivePresenter website and download the latest version for 2026. The installation is clean—no bloatware or hidden ads.
Step 2: Choose Your Recording Mode
Upon launching, you are greeted with a dashboard. You have two primary options:
- Record screen as Video: This records full-motion video (MP4). Ideal for gameplay or live demonstrations.
- Record Interactive Simulation: This is the “Smart Capture” mode mentioned earlier. Ideal for software guides.
Select “Record screen as Video” for this tutorial.

Step 3: Configure Settings
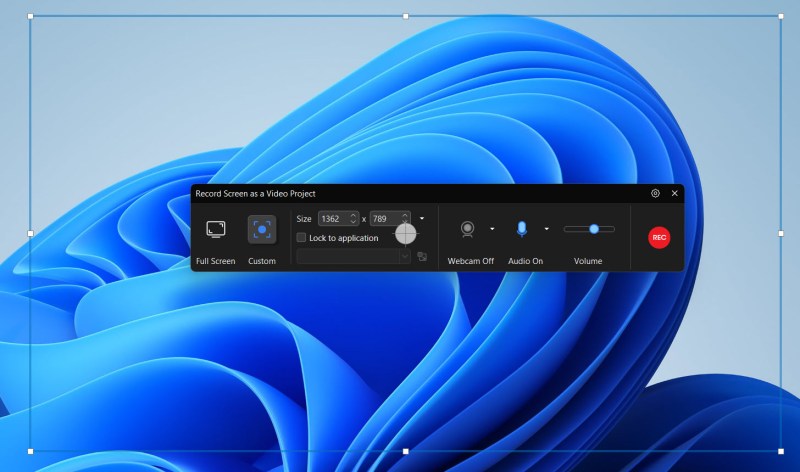
A recording toolbar will appear.
- Capture Area: Select “Full Screen” or “Custom” to draw a frame around your target app.
- Audio & Webcam: Toggle your Webcam “On” if you want a face-cam. Ensure your microphone is selected.
- Volume Check: Speak into your mic and watch the green bar to ensure levels are good.
Step 4: Record and Annotate
Hit the Rec button. Perform your actions on the screen. When finished, press Ctrl + End (or your hotkey) to stop.
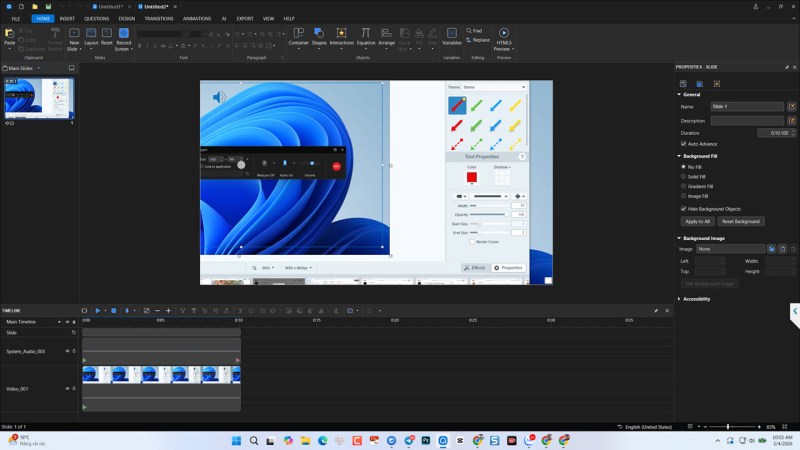
You are immediately taken to the Editor Interface. This is where the magic happens:
- Cut/Delete: Select parts of the timeline (the “ums” and “ahs”) and delete them.
- Insert Shapes: Go to the “Insert” tab and add an arrow pointing to important details.
- Zoom-n-Pan: If the text on your screen is too small, use the Zoom-n-Pan feature to digitally zoom in without losing quality.
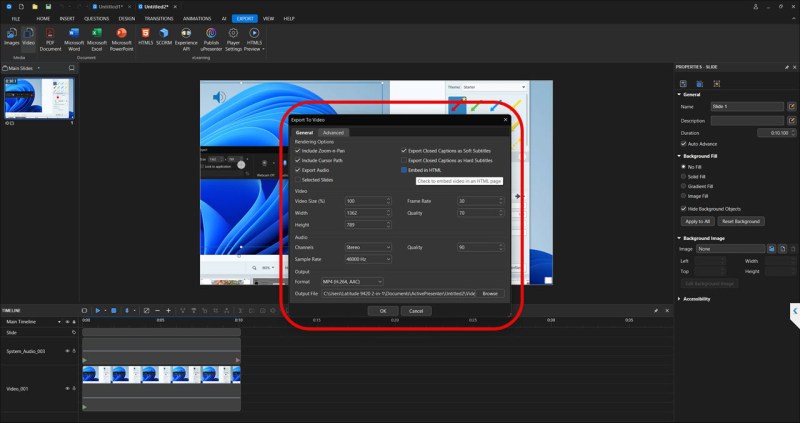
Step 5: Export Your Masterpiece
Go to the Export tab and select Video.
- Format: Choose MP4 (H.264) for the best balance of quality and file size.
- Quality: Set to 100% or adjust bitrate for YouTube optimization.
- Click OK, and your watermark-free video will render.
Advanced Tips for Screen Recording in 2026
Whether you choose iTop or ActivePresenter, adhering to these best practices will elevate your content.
1. Clean Your Desktop
Before hitting record, hide your desktop icons. A messy desktop distracts the viewer. Both ActivePresenter and Windows have settings to hide desktop icons temporarily.
2. Audio is King
Viewers will forgive bad video quality, but they will click away instantly if the audio is bad.
- Use a dedicated USB microphone if possible.
- If using ActivePresenter, utilize the “Audio Noise Reduction” feature in the Timeline to remove the hum of your air conditioner or PC fan.
3. Plan Your Script
Don’t just “wing it.” Have a bullet-point list of what you want to cover. This reduces editing time significantly.
4. Use Hotkeys
Learn the Start/Stop/Pause hotkeys. Nothing ruins a video flow like seeing the mouse drag down to the taskbar to click “Stop.”
Frequently Asked Questions (FAQ)
Q: Is there a truly free screen recorder without a watermark?
A: Yes. ActivePresenter allows you to record and export video without a watermark in its free edition for non-commercial use. OBS Studio is another option, but it has a much steeper learning curve and lacks editing features.
Q: Can I use ActivePresenter on a low-end laptop?
A: ActivePresenter is relatively optimized. However, for 1080p recording, you should have at least 8GB of RAM. If you experience lag, try using the “Smart Capture” mode, which is much less resource-intensive than full-motion video recording.
Q: Why is ActivePresenter better for teachers?
A: Beyond video, ActivePresenter allows teachers to create interactive quizzes and export lessons to SCORM or xAPI standards for Learning Management Systems (LMS). iTop cannot do this.
Conclusion: The Final Verdict
In our review of iTop Screen Recorder 2026, we found it to be a capable tool for casual users who need a “quick and dirty” recording. Its Game Mode is a nice touch, and the interface is user-friendly. However, the restrictions on the free version—specifically watermarks and limited editing—prevent it from being a professional solution.
If your goal is to create high-quality content, tutorials, or educational materials, you need more than just a recorder; you need a production suite.
ActivePresenter stands out as the Best free screen recorder for PC in 2026 because it respects the creator. It gives you the power of a professional video editor and the utility of a robust screen recorder, all without stamping a brand logo on your hard work.
Ready to level up your video content?
[Download ActivePresenter Free Edition Here]
Experience the freedom of unlimited recording and professional editing today.
Note: This review is based on the 2026 software versions. Features are subject to change by developers.

Leave a comment