You’ve probably needed to record your computer screen more than once. Maybe it was to capture a “highlight” game reel to show off to friends, save an important online lecture, or create a “heartfelt” tutorial for a colleague.

The need is there, but when you start searching, you’ll immediately get “lost” in a jungle of software.
I’ve been in your shoes. I wasted so much time downloading, installing, and then uninstalling dozens of different programs. Some plaster a “massive” watermark right in the middle of the screen, others only let you record for 10 minutes, and some have an interface so complicated it “makes you want to smash your computer”.
To save you the time and effort of “following in my footsteps,” this article will round up the 5 hottest screen recording tools available today. Most importantly, I’ll categorize them clearly: 3 screen recording tools that are 100% free with no watermark and 2 professional tools that offer a free version. You just need to figure out your needs and download the software.
Let’s get started!
Group 1: 100% Free Screen Recording Software (No Watermark, No Limits)
This is the “real deal” group, true to the “free” criteria we’re looking for. You can use them long-term without paying a dime, worrying about watermarks, or time limits. Honestly, because these tools are free, I always keep them installed on my computer.
1. OBS Studio – The Free “King” of Streaming and Screen Recording
It would be a major oversight to talk about free screen recording or livestreaming without mentioning OBS (Open Broadcaster Software). It’s open-source software, meaning it’s “free for life” and supported by a massive community. The livestreaming feature in OBS Studio isn’t something you find in just any free software.
I have a detailed video tutorial on how to use OBS Studio for screen recording on my channel, you can check it out:
Pros (Based on my experience):
- 100% free, no watermark, no limits. This is its biggest selling point.
- Runs on all platforms (Windows, macOS, Linux).
- The second “money-maker” for OBS is its customization. You can create multiple “Scenes”. For example: one scene with just your game screen, another with your webcam added, a scene for “chatting” with your audience… and switch between them smoothly.
- Good quality video and audio output, supports direct livestreaming.
Cons:
- The interface is not beginner-friendly. The first time you open it, you might be “overwhelmed” and not know where to start. This is the biggest barrier.
- It doesn’t have a video editor. Once you’re done recording, that’s it. If you want to cut, merge, or add effects, you have to use another program.
Who is it for? Streamers, gamers, or those who like to “tinker” and want to control everything professionally. If you just need simple screen recording, consider the next option.
2. ActivePresenter – The “All-in-One” for E-learning and Tutorials
If OBS is a 2-in-1 “livestream and recording” tool, ActivePresenter is a versatile “toolkit”. This has been my “go-to” for a long time, especially when making tutorials or E-learning lectures. ActivePresenter not only lets you record your screen but also allows you to edit the video and create complete eLearning courses. If you only need the screen recording feature, it’s 100% free, with no watermark, and no time limit.
I have a very detailed tutorial on ActivePresenter on my YouTube channel, check it out:
Pros (Why I recommend it):
- The point I “love” the most: The Free Edition has NO watermark, NO time limit.
- It doesn’t just record the screen; it also integrates a very powerful video editor. After recording, you can cut, merge, add text, blur, and even add interactive quizzes right in the software.
- The interface is very intuitive; if you’ve used PowerPoint, it will feel very familiar.
Cons (Yes, it has them):
- The free version locks some advanced export features (like exporting to PDF, Word…).
- But if you just need to export to MP4 video for YouTube or storage, the free version is more than enough.
- Because it has so many features, it might be a bit heavy on your computer if your project is too complex.
Who is it for? This is the “golden” choice for teachers, lecturers, tutorial creators, office workers… anyone who needs an “all-in-one” tool that is also free.
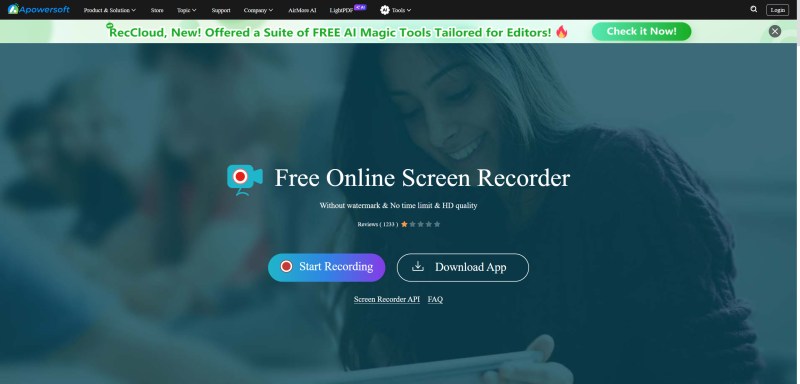
3. ApowerSoft Free Online Screen Recorder – Quick, No Installation Needed
This is an “instant noodle” solution for those who hate installing software. As the name suggests, it’s an online screen recording tool. I often use this app when I don’t want to download and install software on a new computer. For a quick task, ApowerSoft is a pretty good choice.
Of course, when using the free version, the company will suggest you download the paid version. No snowflake is ever truly pure! However, just ignore those offers and you’ll be fine.
Pros:
- Free, no watermark, no time limit.
- The biggest advantage is no installation required (just need to run a small launcher the first time). Very handy when you’re using a public computer or someone else’s machine.
- “Super” simple interface. Just press the button to record.
Cons:
- Since it’s an online tool, you must have a stable Internet connection.
- Almost no customization options.
- And of course, it doesn’t have a video editor.
Who is it for? People who need to quickly record a simple action, record an online meeting, and don’t want to install anything extra on their machine.
Group 2: Professional Screen Recording Software – With Free (Trial/Limited) Versions
This is the “be careful” zone. Many beginners get confused in this group. These are paid, VERY GOOD software, but their free versions are essentially just “bait” (trial or freemium). I’m including them here so you can tell the difference and avoid wasting time.
There are countless programs like this in the world. Their marketing strategy screams “completely free,” but in reality, the free version won’t let you export a usable product. However, if you’re willing to invest money in a software license, you can consider these two recommendations. These programs don’t just have screen recording; they come with a full suite of ‘pro-level’ video editing tools.
4. Camtasia (2025) – The Gold Standard for Professional Tutorials
There’s no denying it, Camtasia is “top-notch”. It’s one of the leading programs, trusted by large companies to create professional-grade tutorial videos. The version I’m currently using is Camtasia 2025. I have to say, it’s extremely handy for making software tutorials. With the support of Audiate, an AI-integrated audio editing app, Camtasia 2025 becomes incredibly valuable.
But let’s be real, Camtasia is the most expensive software I’m mentioning here. Before 2025, Camtasia offered a lifetime license. But after 2025, Camtasia only has an annual subscription. Each license is about $178 USD/year.
If you want to see how to use Camtasia, you can also watch the video on my YouTube channel for more information about Camtasia 2025:
Pros (of the paid version):
- Extremely intuitive drag-and-drop video editor. You’ll find it “a joy” to make tutorials compared to other software.
- Works very stably, smoothly, and has many available templates.
- The output video quality is flawless.
Limitations of the “Free” Version (Here’s the trap!):
- Its “free” version is actually a Free Trial, usually 30 days.
- Most importantly: All videos you export from the trial version will be stuck with a very large Camtasia watermark. You can’t use that video for work.
Who is it for? Businesses, professional content creators with a budget to invest (its price isn’t cheap). You can download the trial to experience how “pro” it is before deciding to buy.
5. Filmora 14 – Screen Recording & Creative Video Editing
Filmora 14 is an extremely popular “all-in-one” video editor, aimed at creativity and ease of use. It not only integrates a smooth screen recording feature but also excels with its intuitive, drag-and-drop video editing. The new version is equipped with many smart AI features (like AI Smart Cutout, AI Copilot Editing…) that automate complex tasks, making it a top choice for YouTubers and Vloggers who want to create professional videos quickly.
I started using Filmora with version 9, back when it was mainly for cutting, merging, and adding effects. As of now, Filmora 14 has seen massive improvements, upgrading with super professional, ‘pro-level’ features for content creators. Speaking only of its screen recording, Filmora isn’t as ‘pro’ as ActivePresenter or Camtasia, but in return, its video editing toolkit ‘blows those two out of the water’.
You can peek at the video about Filmora 14 on my channel:
Pros (of the paid version):
- Modern, beautiful interface, even easier to learn than Camtasia.
- Built-in screen recording feature.
- A library of ‘dazzling’, trendy effects, filters, and templates that are constantly updated.
Limitations of the “Free” Version (Also a trap!):
- This is “Freemium”. You get to use almost all features, but when you export the video, it “gifts” you a very obvious Filmora logo.
- Want to remove the logo? You have to pay.
Who is it for? YouTubers, Vloggers, content creators who want videos with lots of beautiful effects and are willing to pay to remove the logo.
Quick Comparison Table of Best PC Screen Recorders
To help you visualize, I’ve summarized the 5 programs in this table:
| Feature | OBS Studio | ActivePresenter | ApowerSoft Online | Camtasia | Filmora |
| Price | 100% Free | 100% Free | 100% Free | Free Trial | Freemium |
| Watermark | No | No | No | Yes (Very large) | Yes (Very large) |
| Time Limit | No | No | No | 30 days | No |
| Video Editor | No | Very powerful | No | Very powerful | Very powerful |
| Complexity | High | Medium | Very Easy | Medium | Easy |
| Best for | Streamers | Education | Quick Record | Business | Creatives |
Final Words
Reading this far, you’ve probably realized there is no “best software for everyone”. Each one has its strengths, weaknesses, and is suited for different needs.
My honest advice:
- If you’re a beginner and need a tool that is 100% free, has no watermark, and includes a video editor for cutting/merging: Download ActivePresenter immediately. This is the best and most balanced choice for a majority of users.
- If you like to “tinker,” want to be a streamer, or need deep customization features and are willing to use a separate program for editing: Learn to use OBS Studio.
- If you “have money” and want a professional, smooth solution from A to Z: Try Camtasia (for tutorials) or Filmora (for creative videos) to see which one suits you better, and then… buy the license.
I hope you find the tool that’s right for you and create some high-quality videos!
Have you used any of these programs? What was your experience like? Share your experience in the comments section below!

Leave a comment