This article will teach you how to watermark your videos with images, texts or low-third videos.
Adding watermark to videos is an effective way to protect your content from thieves or simply to let viewers know about you and your company. There are many professional watermark apps available to use nowadays, they often come with many interesting features such add many images at the same time or customize your watermark and so on. The point is that you need to purchase a license at around $20 – $50 or subscribe to a monthly plan. That’s not a big deal for business purpose, but students and personal users don’t like it.
Luckily, there’s a free and simple to use program can help you watermark your videos for free which I’ve been using for years. That’s ActivePresenter – a free screencast software for Windows and Mac.
In today’s post, I will share with you how to add watermarks to your videos in ActivePresenter step by step. It is very simple and surprisingly fast.
First of all, spend 5 minutes to download and install it on your computer before we go.
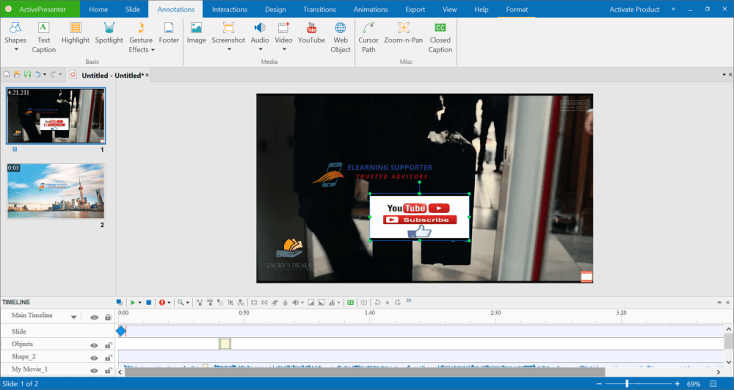
Here’s the interface of ActivePresenter 7.

Okay! You get the progam now, right? Let’s do it now!
How To watermark your video with an image/ video
In order to add watermark to your video with your own images, logos or icons, you’ll need to add your video to the editor first.
- Choose Create Blank project from the interface.
- From Home tab-> New Slide
- From Annotation tab -> Video -> From file… or Webcam recording…
Now you have a new slide where you can add watermark to it easily. There are different ways to do that in ActivePresenter. All the options are in Annotation tab. Take one of these below options:
- Annotation-> Image: Choose your own logo or image you want to use as a watermark on your video.
- Annotation-> Shapes -> Choose any type of shape to use as a watermark for your video. Inside the shape, you can type text and customize font size, color and so on.
- Annotation-> Footer: Add text or image to the video footer area.
This is the screenshot of the work your can do in ActivePresenter.
Remember that ActivePresenter also allows you to add effects to the images you added, customize appear and disappear time. You can just drag-n-drop the images on the timeline. For adding effects to the image-> Click on the image -> Go to Annimation and choose the effect you want.
Once you finish, go to Export tab to render your video and finish the work. ActivePresenter lets you render video into MP4, AVI, MKV, WebM for free and without watermark.

So you know how to watermark your video with an image in ActivePresenter, right?
I seldom watermark my videos with another video. However, if you wish to do that, ActivePresenter can help. All the steps are the same with my above tips.
- Create blank project
- Home tab-> New slide
- Annotation tab-> Video -> Import from file…
- Annotation tab-> Video-> Import from file…
Now you have two videos at one slide. You can adjust the position and size of the second video so that it become a watermark of your video.
Bottom line
I hope my tutorial is simple enough for you to follow. If you have any question, please don’t hesitate to ask. Elearning Supporter is your trusted resource for software reviews and business software buying guides. Don’t forget to follow us to receive more valuable post notifications in the future.
Read also: Best presentation software of 2018!
Good luck!

Leave a comment