Recording Windows applications is possibly the best way to save your time explaining about an application or a software which is running on your computer. It’s especially useful when you are not a professional writer. You don’t know how to write tutorial document clearly. In this post, we’ll cover some simple tips to help you record Windows applications to produce how-to video tutorials to share or upload on YouTube quickly.
The tool I recommend you to use is ActivePresenter, a free and powerful screen recorder & video editor of Atomi Systems. This free screen recorder allows you to capture your computer screen in full HD quality without watermark or time limit. It’s a perfect tool to record Windows applications nowadays.
Users can download and install ActivePresenter in few minutes. The latest version is ActivePresenter 7 which is available for Windows 64 bit or macOS X. You can go directly to Atomisystems.com to download or click here to be redirected to the download page.
Ok, let’s getting started now.
How To Record Windows Applications
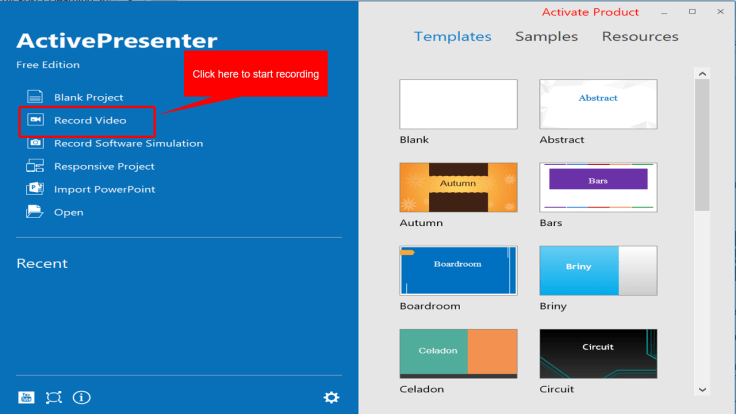
1. Launch the program
Once the program is installed on your computer, open it. You’ll see ActivePresenter start page. There are some options you can choose to launch the recording toolbar. To record a Windows application, click on Record Video as you see in this picture.
2. Configure recording settings
After that, you’ll see a recording toolbar where you should customize some settings before you click the record button. Being mentioned that ActivePresenter allows you to record full screen, a fixed area, a locked application with your webcam and audios from your microphone. Everything is on the toolbar. If you need to access more settings such as hotkeys, recording cursor, video codec and so one, click the gear icon at the top right corner of the toolbar.

3. Start and Stop Recording
Once you finished settings, hit REC button on the toolbar. The program will count down from 3 to 1 before starting recording the screen. Then you minimize the floating toolbar to the notification area. During the recording, you can also pause, start or stop the recording by default hotkeys or pull out the toolbar from notification area and click. There is a useful tutorial about how to start and stop recording in ActivePresenter here.
4. Edit Recorded Video And Export
Being mentioned that ActivePresenter workflow is slightly different compare to other simple screen recorder. Once you hit stop recording, the program will redirect you to its video editor no matter you choose this option or not. In this video editor, you can do many thing such as adding text, annotations, cut, trim, crop video and more. If you don’t need to edit your recording, then simply export it to get final result.

That’s it! So you know how to record Windows applications now. If you need any further tutorial about ActivePresenter, please let us know in the comment section. We’re here to help. If you find this tutorial helpful, please share your comment with us. Don’t forget to follow us to receive more valuable post notifications in the future.
Good luck!

Leave a comment