Taking Scheduled Screenshot Using ActivePresenter

This tutorial shows you how to take a scheduled screenshot, or delayed screenshot using Atomi ActivePresenter 7. If you want to learn more about this powerful tool, read our review here!

Keynotes:

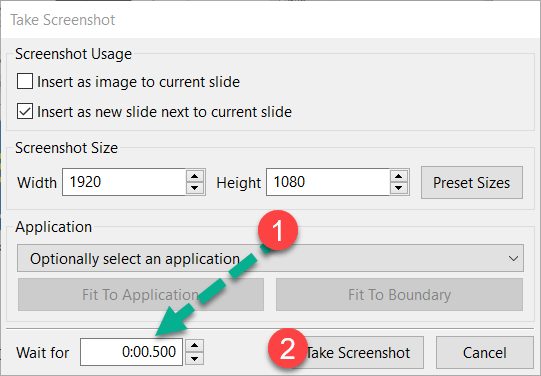
  • Select Annotation-> Screenshot from its main work space.
  • Select Application or Region.
  • Select how much time in Wait for box.-> Take screenshot and wait for the program to capture image.

Delayed screenshot ActivePresenter

Advertisement

Leave a Reply

Fill in your details below or click an icon to log in:

WordPress.com Logo

You are commenting using your WordPress.com account. Log Out /  Change )

Facebook photo

You are commenting using your Facebook account. Log Out /  Change )

Connecting to %s

This site uses Akismet to reduce spam. Learn how your comment data is processed.

Create a website or blog at WordPress.com

Up ↑