Searching for a reliable tool to capture your desktop activity can feel like navigating a minefield. You find software that looks perfect, spend time recording your tutorial or gameplay, and hit “Export”—only to discover a massive, ugly logo plastered across your video. Or worse, the recording stops abruptly after 5 minutes because you haven’t paid for the premium version.
If you are a content creator, educator, or business professional, you simply cannot afford these limitations. You need a free screen recorder no watermark that delivers clean, professional results.
Recently, Screenrec has gained popularity as a lightweight solution. But is it truly the best option to record screen windows 10 for serious projects? In this in-depth review, we will analyze Screenrec’s capabilities and introduce a powerful alternative—ActivePresenter—that might just be the all-in-one video production studio you’ve been looking for.
What is Screenrec? The “Instant” Solution
Screenrec markets itself as a productivity tool designed for business communication rather than heavy-duty content creation. It is a cloud-based screen recorder and screenshot tool available for Windows, Mac, and Linux.

The core philosophy of Screenrec is speed. The moment you finish recording, the video is uploaded to the cloud, and a shareable link is copied to your clipboard.
Key Features of Screenrec
- One-click Capture: Start and stop recording with a simple hotkey.
- Instant Sharing: Automatically uploads to a private cloud account (2GB free storage).
- Lightweight: Minimal impact on system performance.
- No Watermark (with conditions): It does not stamp a watermark if you create a free account.
The Pros: Where Screenrec Shines
For quick, internal communication, Screenrec is decent.
- Speed: If you need to show a developer a bug or send a quick “how-to” to a colleague, the instant link feature is a time-saver.
- Simplicity: The interface is essentially a sidebar widget, making it very unobtrusive.
The Cons: Why It Might Not Be Enough
However, if you are looking to create YouTube videos, professional training courses, or marketing materials, Screenrec hits a wall quickly:
- Dependency on Internet: Since it relies on cloud uploading, slow internet can ruin your workflow.
- Zero Editing Capabilities: This is the deal-breaker for many. Screenrec allows you to record, but it offers almost no tools to edit that footage. You cannot cut out mistakes, add zoom-and-pan effects, or insert annotations.
- Limited Export Options: While you can download the MP4, the workflow is designed for cloud viewing.
The Gap: Recording is Only Half the Battle
Here is the reality of video production: Raw footage is rarely perfect.
When you record screen for a tutorial or a presentation, you will inevitably sneeze, stumble over your words, or open the wrong file.
- If you use a basic tool like Screenrec, you have to re-record the whole thing or import the footage into a separate, heavy video editor (like Premiere Pro) to fix it.
- This fragments your workflow and wastes time.
What you actually need is a hybrid tool: A software that records your screen in high quality and gives you a timeline editor to polish the video immediately.
Enter ActivePresenter: The Ultimate Free Screen Recorder No Watermark
If Screenrec is a “quick note,” ActivePresenter is a “published book.” Developed by Atomi Systems, ActivePresenter is widely recognized in the eLearning and YouTube community as one of the most powerful free screen recording and video editing software available.
Unlike “freemium” tools that cripple the free version, ActivePresenter allows you to use all recording and editing features without time limits and without watermarks (for non-commercial use/standard export).
Why ActivePresenter Beats the Competition
1. Advanced Built-in Video Editor
This is where ActivePresenter leaves Screenrec in the dust. After recording, you are taken directly to a timeline editor where you can:
- Cut/Split/Delete/Join: Remove boring parts or mistakes effortlessly.
- Change Playback Speed: Speed up tedious processes (like software installation) to keep viewers engaged.
- Blur Effect: Vital for security. Easily blur out passwords or sensitive data in your recording.
- Zoom-n-Pan: Guide your viewer’s eye to specific buttons or menu items—a must-have for software tutorials.
2. Unlimited Recording Time
Many “free” recorders limit you to 5 or 10 minutes. ActivePresenter lets you record for hours if your hard drive space permits. This makes it perfect for recording webinars, long lectures, or full gameplay sessions.
3. High-Quality Export
You can export your final video to popular formats like MP4, AVI, MKV, WMV, and WebM. You control the frame rate, keyframe interval, and quality settings.
Step-by-Step: How to Record Screen Windows 10 with ActivePresenter
Ready to create your first professional video? Follow this simple guide.
Step 1: Download and Install
Visit the official download page and install ActivePresenter. It is fully compatible with Windows 10 and Windows 11.
Step 2: Select “Record Video”
Upon launching the app, you will see several options. Click on “Record Video”. This mode is optimized for creating video tutorials and YouTube content.
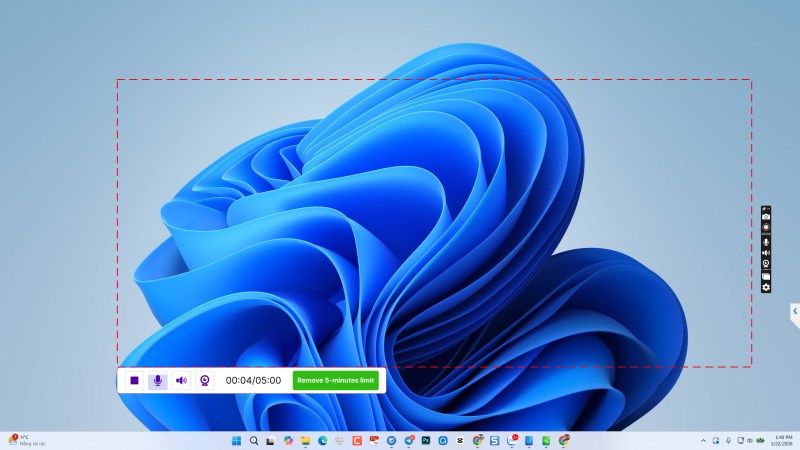
Step 3: Configure Your Recording Area
A floating toolbar will appear (similar to Screenrec but more powerful).
- Full Screen: Ideal for comprehensive tutorials.
- Custom: Drag the blue rectangle to capture a specific window or region (e.g., 720p or 1080p).
Step 4: Set Up Audio and Webcam
Don’t forget the sound!
- Audio On: Toggle the microphone icon to record your voiceover. Toggle the system audio icon to record computer sounds.
- Webcam: You can record your webcam simultaneously to create a “Picture-in-Picture” effect, adding a personal connection with your audience.
Step 5: Record and Edit
Click the big red REC button. Perform your actions on the screen. When finished, press Ctrl + End (default hotkey) to stop.
You will immediately be transported to the Editor interface. Here, you can trim the start/end, add background music, or insert text captions.
Step 6: Export Without Watermark
Go to the Export tab $\rightarrow$ select Video. Choose your desired format (e.g., MP4) and click OK. The resulting video is clean, crisp, and watermark-free.
Comparison: Screenrec vs. ActivePresenter
To help you decide, here is a quick comparison of these two tools based on the needs of a content creator.
| Feature | Screenrec | ActivePresenter (Free Edition) |
| Watermark | No (requires account) | No (Non-commercial) |
| Time Limit | Unlimited (5 mins for guest) | Unlimited |
| Editing Tools | None | Advanced (Cut, Crop, Zoom, Pan, Blur) |
| Audio Recording | Yes | Yes (Multi-track editing) |
| Webcam Recording | Yes | Yes (Green screen support available) |
| Export Formats | MP4 (Cloud focus) | MP4, MKV, AVI, WMV, WebM |
| Best Used For | Quick bug reporting | Tutorials, YouTube, Training, eLearning |
Conclusion
While Screenrec serves a purpose for instant, disposable communication, it falls short for anyone looking to produce lasting content. If your goal is to create polished tutorials, educational videos, or YouTube content that looks professional, you need control over your footage.
ActivePresenter stands out as the superior choice. It is not just a free screen recorder no watermark; it is a comprehensive video production suite that empowers you to turn raw screen captures into engaging stories.
Ready to level up your video content?
Stop struggling with limitations. Download ActivePresenter today and experience the freedom of unlimited recording and professional editing—all in one place.

Leave a comment