Recently, Wondershare Filmora released a new version of Filmora video editor with some promising features. We decided to test it and here’s what we found in this new edition. To read our detail of the old version, click here!.

When it comes to video editing, Filmora video editor is one of the most lightweight and easy-to-use software we’ve reviewed. This program comes in to serve a large amount of novices and casual users who need a quick and simple program that allows them to cut, trim, merge video clips as well as add a title, filters or transitions directly and easily on the timeline. This video editor gained our trust as it works perfectly for many video editing purposes.
This new version of Filmora video editor has some important features that many users, including me, are looking for, such as multiple video tracks, audio key-frame, proxy workflow (adjustable playback quality, enhanced Chroma key, enhanced video stabilization, faster video rendering speed and the capability to handle large video files. In theory, these changes are great if they work.
How does Filmora 9 compare to its previous version?
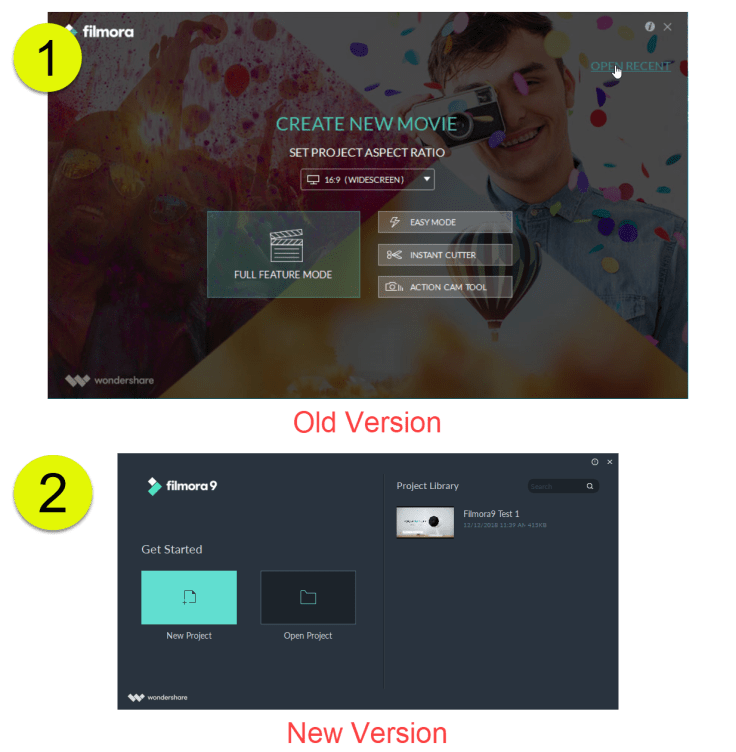
Simplified Start Page
Filmora 9 comes in with a brand new and simplified Start page. This new option does not allow users to set project aspect ratio or choose a mode to get started like its old version. If it’s the first time you launch the program, there is only one option is to Create a new project. By doing this, Wondershare predicted that its Simple Mode, Instant cutter and Action Cam Tool are not needed to be at the first page of the program. Frankly speaking, I don’t really appreciate this changes. Because some users are still using the Simple Mode to create quick slideshow from still images and clips. They are still useful. Then, why would they want to removed them?
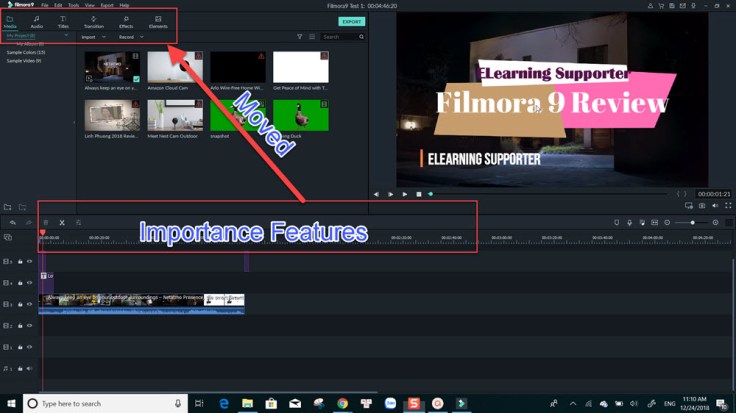
Important Features Are Moved
Different start page is not the only thing we saw in this new version. The working place is also changed dramatically compared to its old version. Important feature buttons on top of the timeline are moved to under the toolbar menu. This change does not seem like any user likes, especially users who love Filmora’s simplicity and ease of use. These big buttons made Filmora easier to use than other similar video editing software programs on the market. But, that’s life! Any change takes time for people to get used to it. If you love its old arrangement, don’t upgrade to this new version.
Old Features: Split Screen Templates & Power Tools disappeared
In this new version, Wondershare decided to remove some useful features such as Split Screen Templates and Power Tool. These are huge time saving options of Filmora video editor. We don’t know why they silently removed these features in this update. As a paid user, we should be notified about any change in the program. Wondershare will have explain about this removal, or at least, tell us where can we find them?
Updates: Wondershare brought back split screen templates in the latest version of Filmora now.
I guess there are many more silent disappearances that I have not discovered yet. If you find that one of your favorite features no longer exists, please share with us. By doing this, we’ll keep new users noticed about the changes in time.
How about Filmora 9 new features?
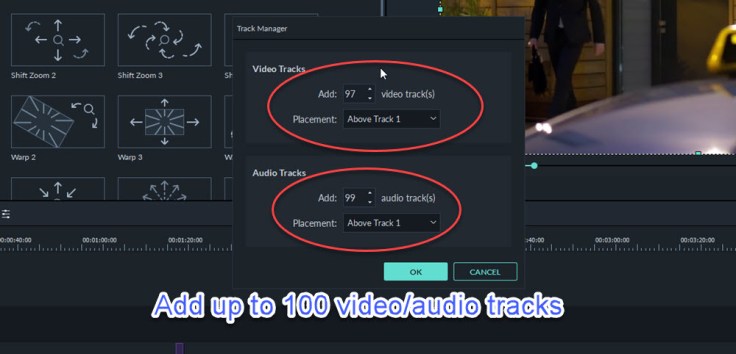
Add up to 100 video/ audio tracks
The first thing we’ve noticed is the multiple video track timeline. Filmora often lets users edit on one single video track, 5 text tracks and up to 10 audio track in its previous version. Now, you can add up to 100 video/ audio track on the timeline. It’s also possible to manage your track via a new track manager. You can adjust the height of each track, delete empty tracks easily through this tool. Thankfully, this feature works perfectly. Nothing to complain about this change.
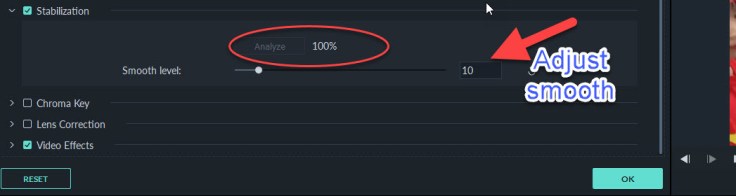
Enhanced video stabilization
Smooth out shake footage with upgraded stabilization tool. This is a new feature in Filmora 9. When you import a shaky footage into the timeline, right click on the clip and choose Stabilizer, the program will automatically scan the whole timeline and give you the option to choose smooth level from 1-100. Technically, this kind of stabilization is nothing more than a pan & zoom action. If you increase the smooth level, the program will perform a zoom in action and via versa. Anyway, it’s good to have this feature to save a few clicks with a shaky footage.
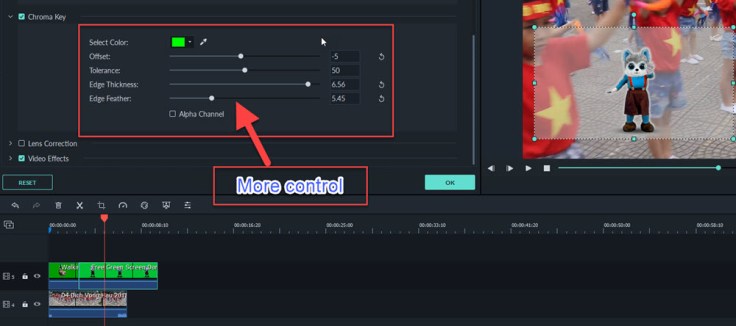
Enhanced Chroma Key
For many users, Chroma key or green screen effect is a crucial feature of a video editing software. Like others, Filmora offers this features since 2016 (maybe earlier), and it’s just as easy to use as other built-in features. In the old version, you’ll need to add your green screen video to the overlay track in the timeline. Then choose effect, Chroma key to remove the background color of your clip. Now it is easier and you’ll have more control of the background as what you see in this screenshot.
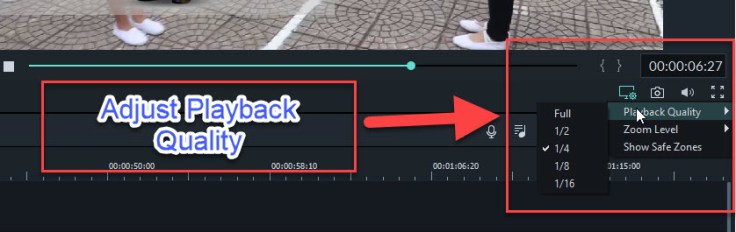
Adjustable Playback Quality
In Filmora 9, you can reduce the resolution of your video preview (playback quality) for a smoother editing experience without affecting the quality of your exported videos. This feature is especially useful for those who are editing videos on low-end laptop/ Pc. It will help you avoid lag issues each time you preview your clips. That’s it!
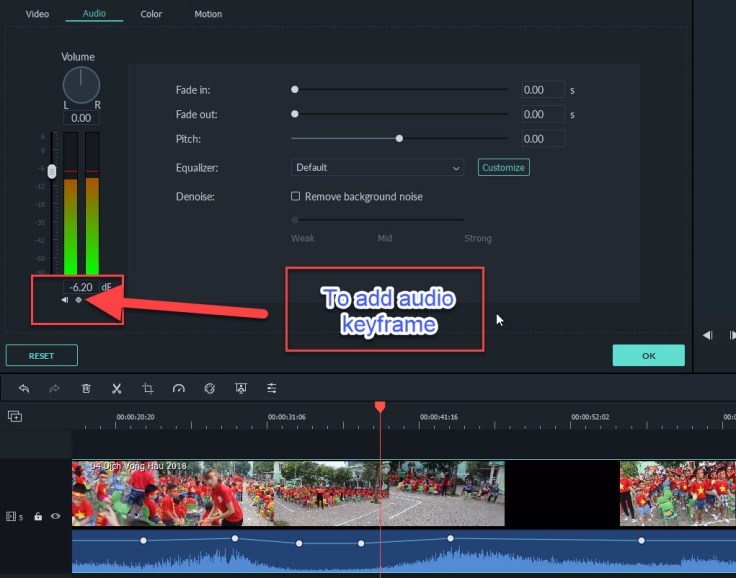
Enhanced Waveforms/Keyframe Audio Editing
With these enhanced/new features, it’s now possible to adjust the audio of your clip directly on the timeline by adjusting the waveform instead of accessing the Audio Fixer like the old version. You can also use audio keyframe tool to customize the sound of your video. I found it a little bit tricky to use audio keyframe with Filmora 9 since the keyframe button is way too small that. Btw, it’s at the bottom of the Master volume controller.
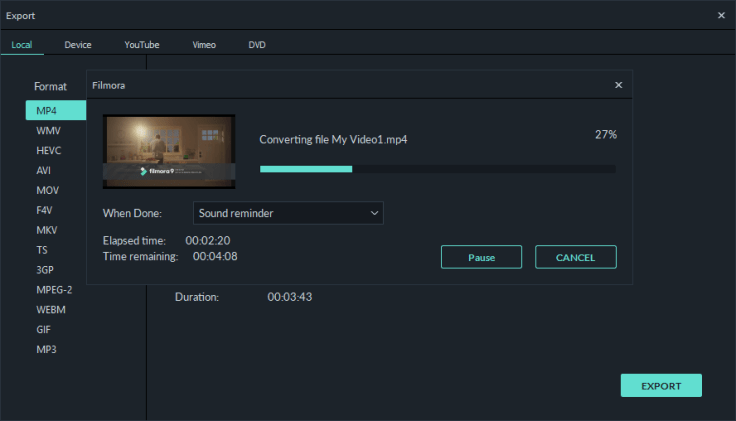
Better video rendering speed?
As the company boasted to provide real-time rendering engine to boost the speed of import and export time, even with 4K footage. This sound great as one of the most important features of a good video editor is, of course, rendering speed. We’ve tested this new feature with several projects (full HD and 4K project) and recognized that this new edition can speed up video rendering speed by about 20% compare to its previous edition. That’s nice! By the way, there are many other factors can affect video rendering speed. You should better check it yourself to see how it works with your machine.
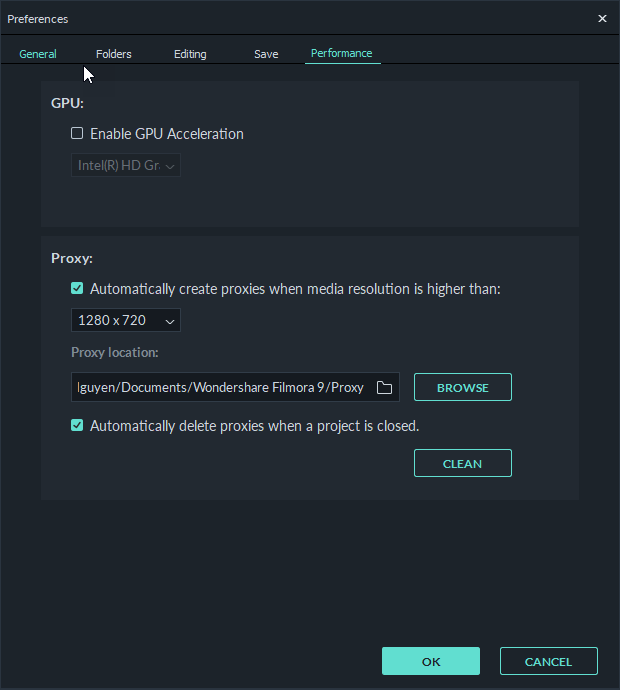
How about Proxy Workflow?
Pricing Detail – No Change
Thankfully, this new version has the same pricing plan with its previous one. Old users of Filmora can upgrade to this edition for free. For new users, it’s still $39.99 for annual subscription and $69.99 lifetime. This price is applied for either Windows and Mac users.
Tips: Use Filmora $14 off discount coupon code Tto save your money if you want to buy it. Follow the instruction in below tutorial.
Download Filmora Video Editor for Windows
Download Filmora Video Editor for Mac
Finally – Is Filmora9 Worth it?
For old users: Well, frankly speaking, it depends very much on your needs. If you want to move a step further, take a look at Filmora 9. Remember that, you can use both Filmora 9 and the older version at the same time on your machine. Once you like it, you can uninstall the old version later.
For new users: We highly recommend you to try this intuitive video editing software. It’s lightweight and easy-to-use for all creators.
If you have any question about this program, don’t hesitate to contact us any time. Don’t forget to follow us to receive more valuable post notifications in the future.
Good luck!

No. It’s free to upgrade.
hi just want to ask, I have my previous version filmora 8 and i want to switch to filmora 9, do i need to purchase again to unlock the features?? be ause in filmora 8 i purchased some of the added features.
Hi Marko, yes. It’s free to upgrade from Filmora 8 to Filmora 9 if you purchased its lifetime license. Filmora 9 is better now!!!
Hello there! I’m using Filmora 8 for a quite some time now and I’m really satisfied with the product. I didn’t upgrade to Filmora9 – I haven’t got any update info about this new version trough information panel, so I concluded it has to be payed. If I understand correctly from your article, I can upgrade to Filmora9 for free?
Thank you!
Hi Ron, to check the version you have, go to Help tab on top window menu -About. About the brightness of the video, check your original footage. If possible, send me some screenshots, or share your footage via email. I can help to check it.
Hi, I just purchased the Video Editor 7,8,9 because one of the most needed features for me is the PiP video option and the split screen templates. The reason that these features are not available in the updated version Filmora9 forced me to stay with Video Editor 7,8,9. In general no problem, but I discovered 2 issues which I don’t know how to change. According the programm I downloaded the most recent version (No updates available when I check) and according the wondershare website this should be a 64 bit version (which I need). The problem I have is that the tekst font of the menu’s looks blurry and not sharp. It looks like I have a 32bits version instead of a 64bit version but I don’t know how to check and how to change without installing Filmora9….another issue… when I play a video shot in full screen mode, the brightness dimms automatically after 2-3 seconds…I checked my system settings, but auto-dim/brightness is off .
who can help me…
Thanks, Ron
Hi at this time, after upgradef to Filmora 9, you can use both versions.
how do you use both versions at the same time?
There is a button on top of the timeline to make all tracks Fit to Timeline. I’ve just sent a screenshot to your email. Pls check it!
My main Filmora9 screen is too long; bits are cut off and to view and use the window has to be dragged right or left. How can I make the editing screen smaller- not the video output since there are instructions to alter the aspect ratio of video output.